|
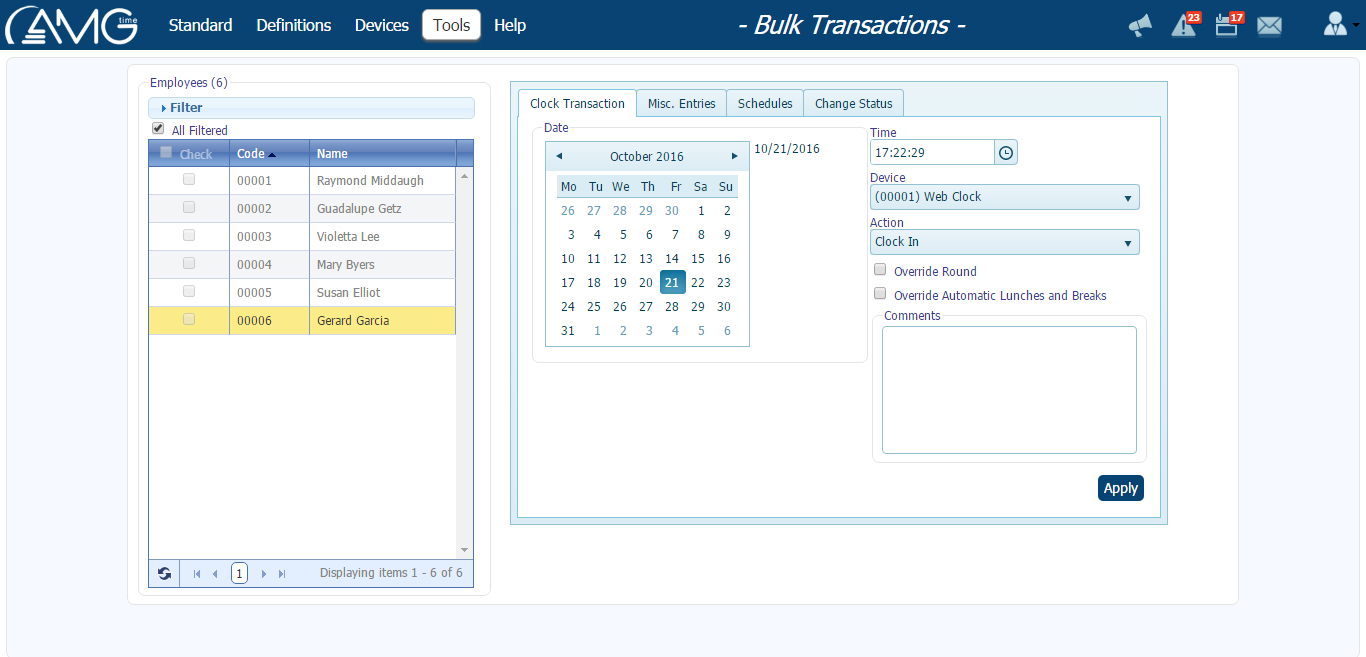
From Bulk Transactions page users can perform any transaction from any device and for any employee.
Committing Transactions
To commit transactions you should do the following:
- In the Employees table check the employee(s) for whom you want to commit a transaction. (Note that there is paging in the list. For checking or unchecking all employees of one page simultaneously you can use check box in the Check column header. For selecting all filtered employees of all pages you should select All Filtered check box.) Before checking employees, you can filter them by status, working time, and employment type. Also you can choose those groups, divisions and headquarters, employees of which should be included in the list. To do this, click on
 buttons and select the groups, divisions, and headquarters you need. buttons and select the groups, divisions, and headquarters you need.
- If committing clock transaction, go to Clock Transactions tab and do the following:
- In the Set Dates calendar select the date(s) of the trnasaction.
- In the Time field enter the time of the transaction.
- From the Choose Device combo box choose the device for which the transaction(s) are to be committed.
- From the Choose Action combo box choose the action which is to be committed.
- Select the additional options you need.
 (Click here to see the description of options.) (Click here to see the description of options.)
Override Round
Select this check box if you don't want to apply rounding settings to the time of the transaction.
Override Automatic Lunches and Breaks
Select this check box if you don't want to automatically apply lunches or breaks, in case when by the scheduled shift it is envisaged that after a certain hours of working a lunch and/or break action will be automatically committed.
Choose Department
Select from the list of departments the one where the employee enters.
Choose Job
Select from the list of jobs the one which the employee is being assigned to. |
- If Comments text field is available, then you can also enter a comment text into that field
- If committing miscellaneous transaction, go to Misc. Entries tab and do the following:
- In the Set Dates calendar select the date(s) of the trnasaction.
- In the Time field enter the time of the transaction.
- From the Category combo box choose the category of the transaction.
- Choose the action: Add or Substract.
- If the chosen category is of an Hourly type
- enter the duration of transaction into Hour and/or Minute fields,
- choose from the OT Level combo box the level, to which the hours should be accrued to: REG, OT1, OT2 or OT3 (will be active only if the chosen category can be overtime),
- select Accrue towards overtime check box, if you want the duration of the transaction be taken into consideration when calculating daily, weekly/biweekly or consecutive overtime hours.
- If the chosen category is of a Money type, then enter amount of money into the Amount field.
- From the Department combo box select the department which should be assigned to the miscellaneous entry. Leave From Schedule option selected, if you want to assign to department mentioned in schedule.
- From the Job combo box select the job which should be assigned to the miscellaneous entry. Leave From Schedule option selected, if you want to assign to job mentioned in schedule.
- If Comments text field is available, then you can also enter a comment text into that field.
- Click on the Apply button.
| Note: |
- After choosing the action, some options will appear on the window, which will vary depending on the chosen action.
- Comments text field will be available if in General Settings page Enable transaction comments option is checked.
|
Copying Schedule
In this page users are also given a possibility to copy schedule from previous week to current week for all employees simultaneously, if current week's schedule is missing.
To copy the schedule you should do the following:
- In the Employees table check the employee(s) for whom you want to commit a transaction. (Note that there is paging in the list. For checking or unchecking all employees of one page simultaneously you can use check box in the Check column header. For selecting all filtered employees of all pages you should select All Filtered check box.) Before checking employees, you can filter them by status, working time, and employment type. Also you can choose those groups, divisions and headquarters, employees of which should be included in the list. To do this, click on buttons and select the groups, divisions, and headquarters you need.
- Go to Schedule tab.
- In the Copy missing schedules from up to 'X' weeks field enter the number of weeks to go back if schedules are missing.
- Click on the Apply button.
To copy schedule from template week to any time period you should do the following:
- In the Employees table check the employee(s) for whom you want to commit a transaction. (Note that there is paging in the list. For checking or unchecking all employees of one page simultaneously you can use check box in the Check column header. For selecting all filtered employees of all pages you should select All Filtered check box.) Before checking employees, you can filter them by status, working time, and employment type. Also you can choose those groups, divisions and headquarters, employees of which should be included in the list. To do this, click on buttons and select the groups, divisions, and headquarters you need.
- Go to Schedule tab.
- From the Template Week Date select the week which should be copied.
- In the Start Date field enter start date of the time period to which you want to copy the schedule of selected week.
- In the End Date field enter end date of the time period to which you want to copy the schedule of selected week.
- Click on the Copy Week button.
Change Status
Users are also given a possibility to change status for all or a group of employees simultaneously.
To change the status you should do the following:
-
In the Employees table check the employee(s) for whom you want to commit a transaction. (Note that there is paging in the list. For checking or unchecking all employees of one page simultaneously you can use check box in the Check column header. For selecting all filtered employees of all pages you should select All Filtered check box.) Before checking employees, you can filter them by status, working time, and employment type. Also you can choose those groups, divisions and headquarters, employees of which should be included in the list. To do this, click on buttons and select the groups, divisions, and headquarters you need.
- Go to Change Status tab.
- Enter the Start Date of the new status.
- Select the corresponding Status, Working Time, Employment, Pay Type Class and Pay Policy values.
- If necessary, select reason of adding new status from Reason combo box.
- If necessary, enter also comments into Comments text field.
- Click on the Apply button.
|